Important note: The easiest way to upload subtitles to YouTube is through the Publish tab (when editing a video). For more information see the Publish help page.
So you've worked hard and created subtitles to your video. How do you add them to YouTube so that everyone who sees the video there can see the subtitles?
Note: Only the video author (the one who uploaded the video to YouTube) can add subtitles to the video. If you're not the author, you can try contacting the author and recommend that he would upload the subtitles by following this tutorial.
For the rest of this tutorial, I assume you've already created the subtitles for your video and just want to upload them to YouTube, if you need help creating the subtitles, go to the YouTube Subtitler Help Center.
Step 1 - Login to YouTube
Go to http://www.youtube.com/ and login with your user and password. If you don't login, you won't have permission to upload the subtitles in a later step.
Step 2 - Download the subtitles
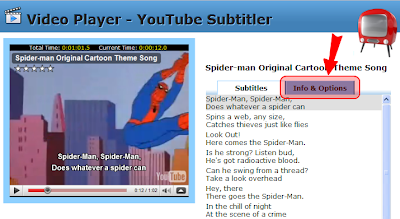
Go to the view page of your video within YouTube Video Subtitler. The video is shown on the left-hand side. On the right hand side you'd probably see the subtitles. Click on the 'Info & Options" tab as shown below:


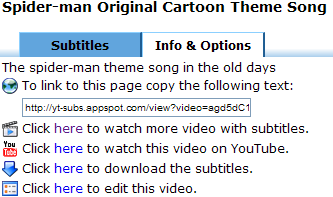
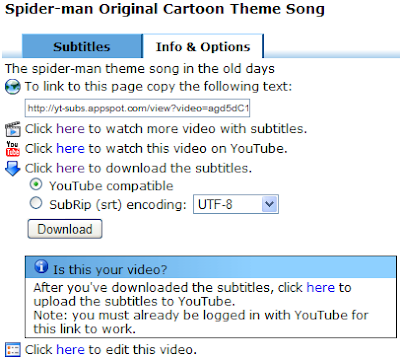
Click on the "down arrow" to download the subtitles. Once you click on the arrow, you'll see the following options:

Click on the 'Download' button to save a copy of the subtitles on your computer.
Step 3 - Upload subtitles to YouTube
Click on the 'here' link within the box titled 'Is this your video?' You should get to a page within YouTube where you can add the subtitles you just downloaded.
Remember the link will only work if you're already logged in to YouTube with your YouTube account. Since YouTube Subtitler is an external site, it has no way of knowing you're actually logged in to YouTube or not (for privacy reasons, which is good).